
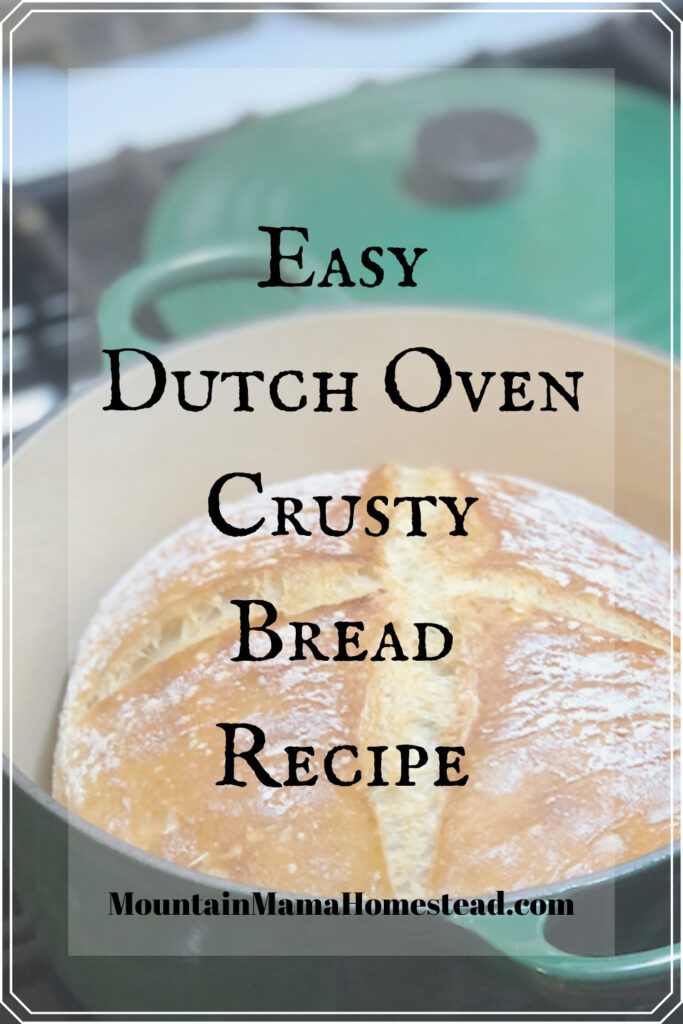
This easy Dutch oven crusty bread recipe is great for beginners, especially if you haven’t made a loaf of yeast bread before. It’s also super simple using only 4 ingredients, one of them being water. I have been making this bread recipe for years now, and it is still my favorite. Give this easy Dutch oven crusty bread recipe a try!
For a long time, I was intimitated by bread making. Especially yeast breads. A lot of times, I would read about very particular directions that seemed very unforgiving. This bread is not that. I’ve made this recipe so many times; I’ve made it (almost) last minute, and only let it rise for 4 hours and it came out fine. Honestly in the beginning, I would just throw the yeast into the warm water (not mixing it in and “activating it”) and then just immediately put it into the flour and salt; and the bread came out absolutely fine and delicious.
So don’t let bread-making intimidate you anymore. Worst case scenario: you have to throw it out and start over. If it gets messed up, it’s not such a big deal since it uses simple and inexpensive ingredients. So, if you have wanted to try making bread and have been waiting, now is the time!
Step 1 of Crusty Bread Recipe: Mixing the Bread Dough
First you’ll want to get your yeast together. Warm up 1.5 C. of water. You don’t want it to be too hot, otherwise it will kill the dry yeast, and too cold, it won’t really activate. Once the water is warm, add 1/2 tsp. dry yeast. Lightly mix it up until it is dissolved. Then leave it for a few minutes while you get the dry ingredients together.
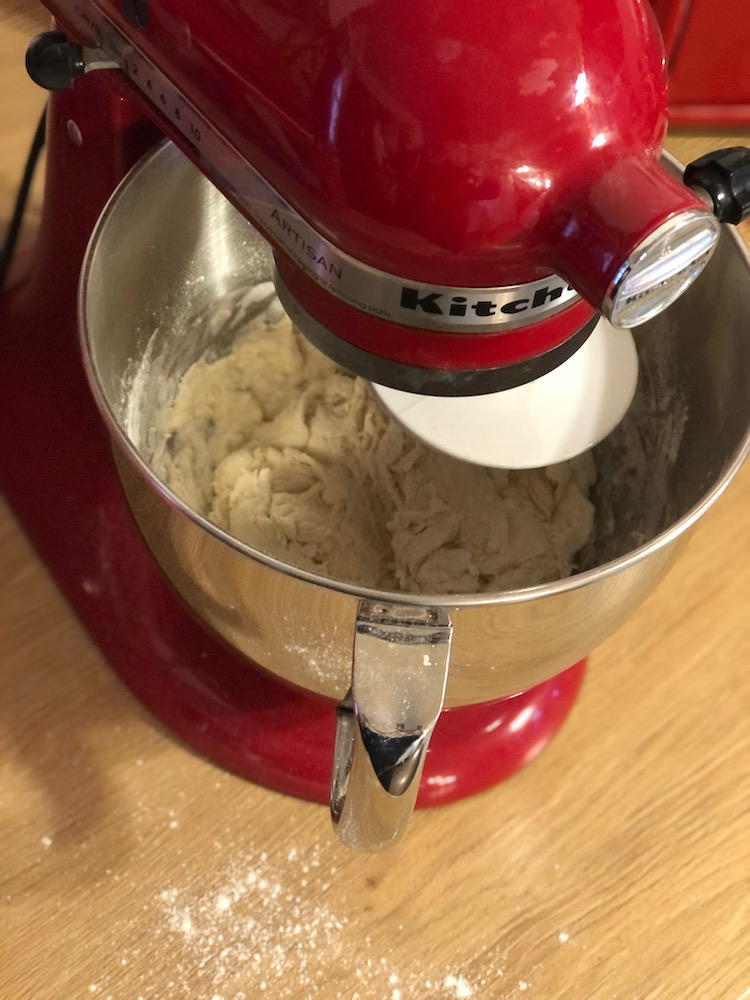
In a seperate bowl, put in 3 C. of flour. I usually use whatever I have on hand; all-purpose or bread flour.
You can also try a ratio of all-purpose and whole wheat if you’d like. I’d recommend using no more than 1/3 whole wheat though.
Then add 1 tsp. salt to the flour mixture.
After that you can add in the activated yeast and water.
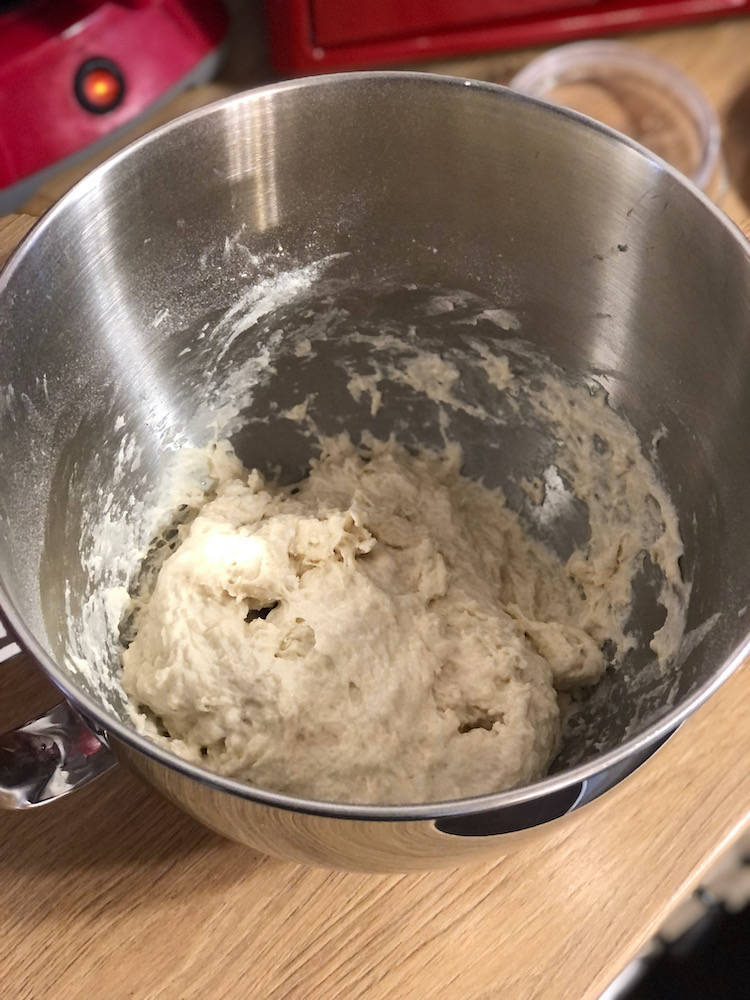
You can either mix it all together with a wooden spoon or mix it in your mixer using the dough hook. Don’t over mix it though. Just enough for it to all be incorporated together.
Step 2: Letting the Bread Dough Rise
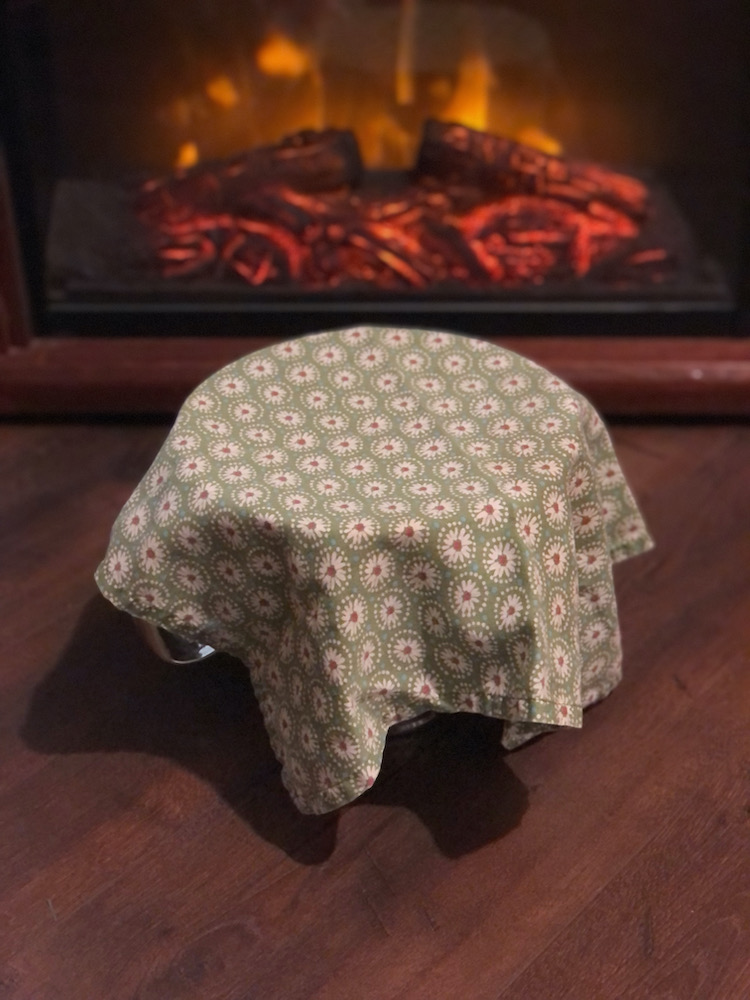
Once the bread dough is prepared, it is time to let it rise. Cover it with a clean kitchen towel or cloth napkin. Put it somewhere in your home that is warm, but not overly hot. Take care that it is far enough away from a heat source. so it doesn’t become a fire hazard. The best is to let it rise all day if you make it in the morning for dinner time or overnight to bake for breakfast time. It should be nice and fluffed up when you return to it.
Step 3 of Crusty Bread Recipe: Tucking into a Ball & Letting it Rest
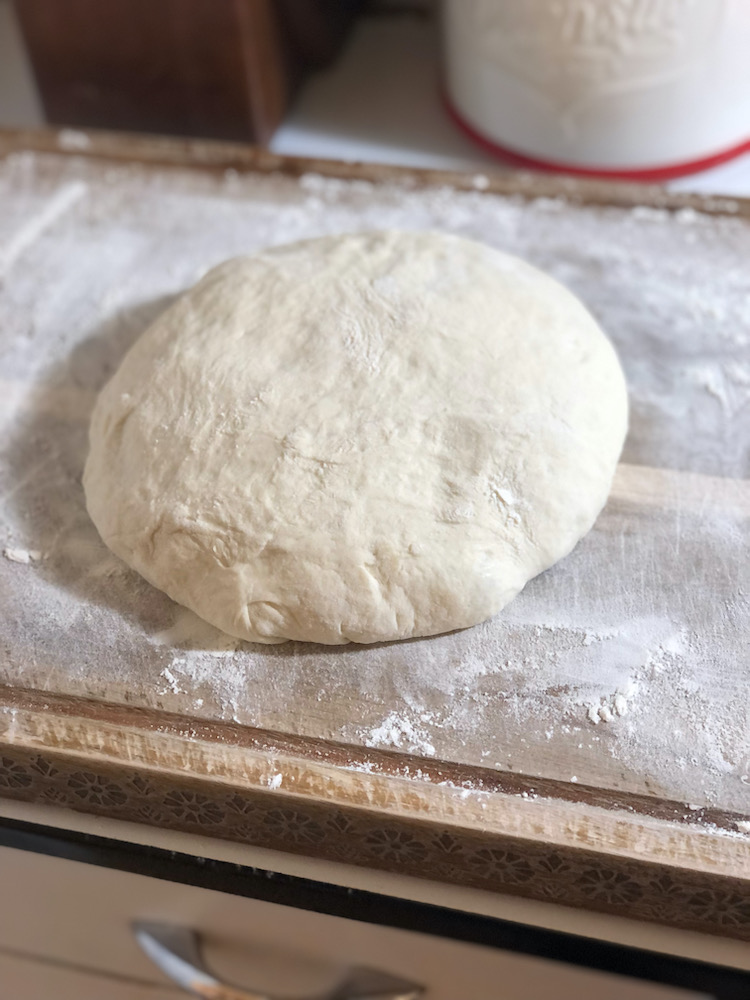
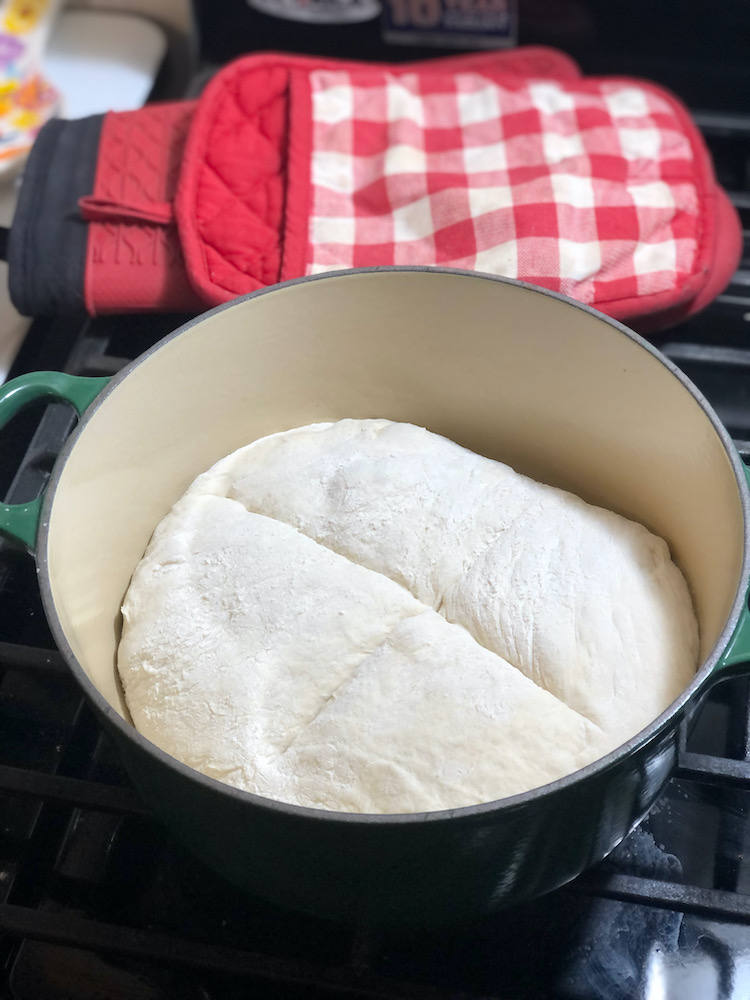
When you are nearing the time for baking the bread, flour your cutting board or counter top. Take out the dough from the mixing bowl and gently tuck the sides under, making a ball shape, like what is pictured. Then, let it rest on the cutting board for 30 minutes.
Step 4: Preheating the Dutch Oven
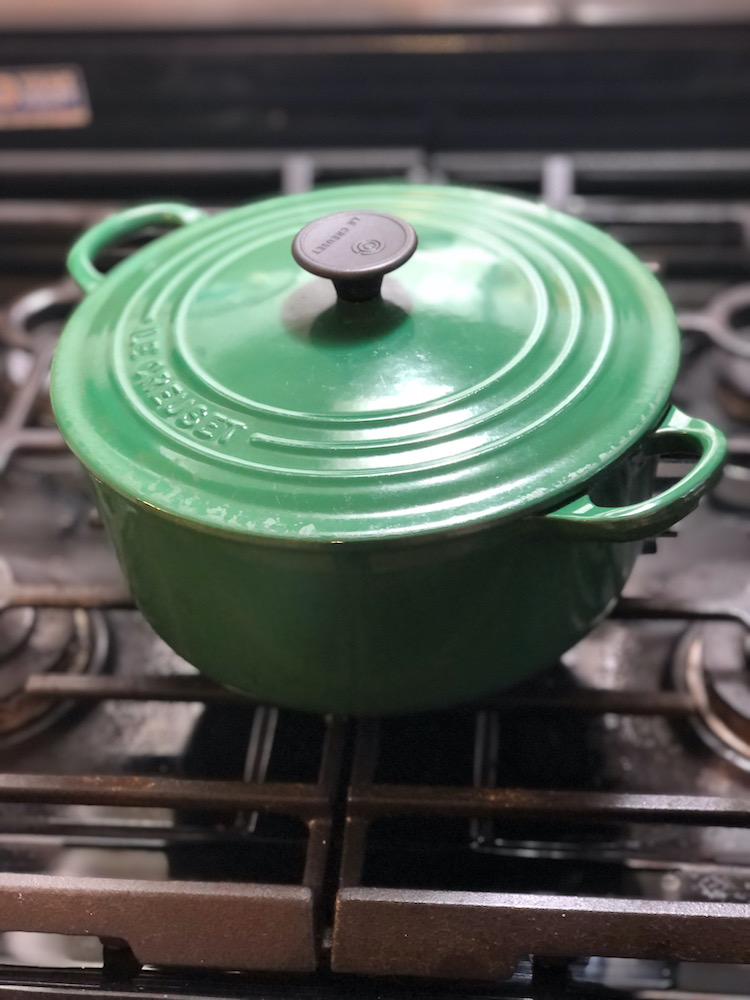
While the bread is resting, prepare the round Dutch oven by placing it into the oven while it is preheating to 450 degrees. This will create a non-stick surface, and there will be no need to use oil or cooking spray.
I use a round, enameled cast-iron Dutch oven by Le Creuset that I scored at a thrift store for $12. But you don’t need a fancy Dutch oven; you can find a decent one for about $40-50. It’s a great investment piece to have in your kitchen.
I’ve only made this in an enameled cast-iron one, but I bet a regular cast-iron Dutch oven would work fine as well.
Step 5 of Crusty Bread Recipe: Baking the Bread Dough
When it’s time to start baking, carefully take the hot Dutch oven out of the oven and place the bread dough into it. Then using a knife, cut an “X” on the top of the dough. Don’t push down too hard, but just enough for it to leave a mark about halfway into the dough.
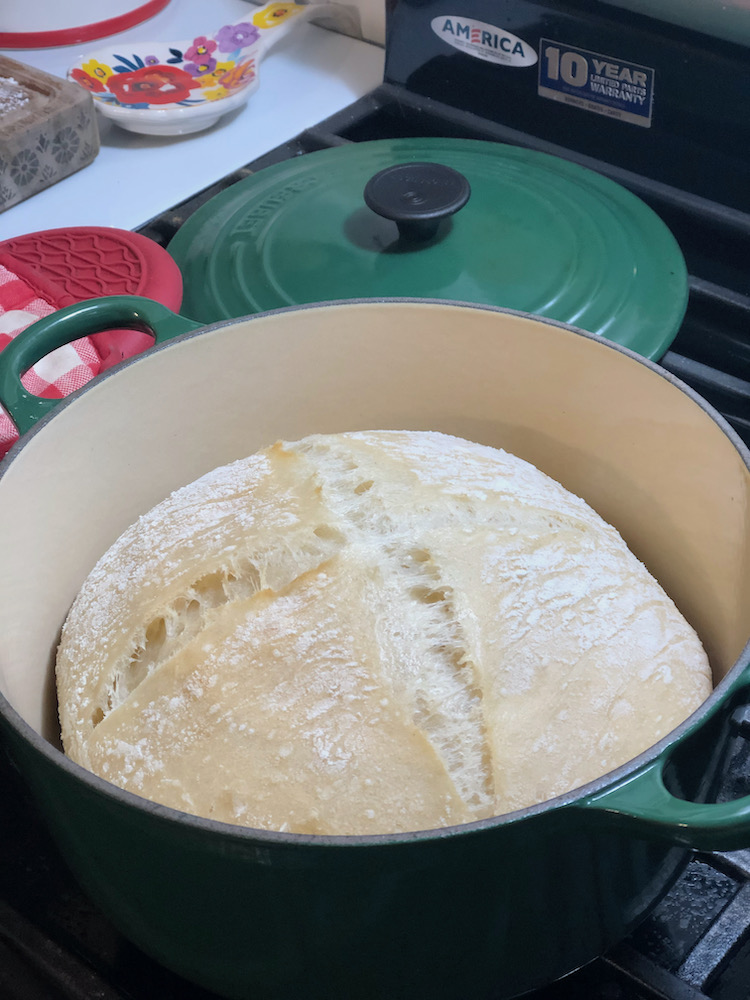
Carefully, put the hot Dutch oven lid back on and place the whole thing into the oven. Let it bake like that for 30 minutes.
Once the 30 minutes are up, take the lid off and bake for another 10 minutes. You can do a little bit less if you’d like a lighter color bread.
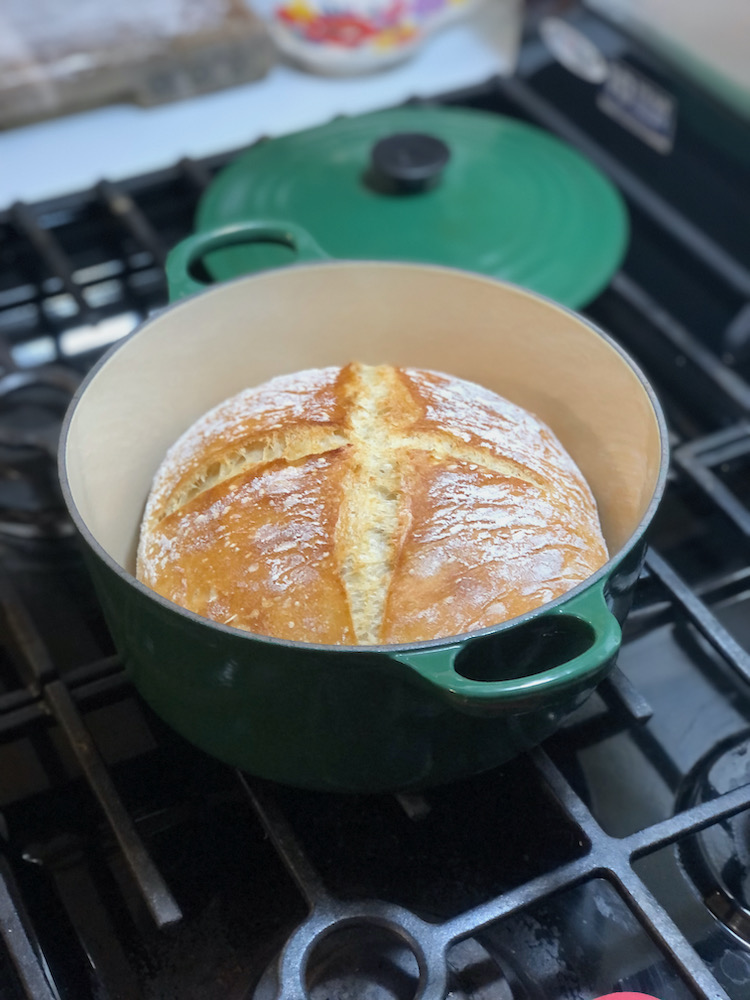
Step 6: Letting the Bread Cool
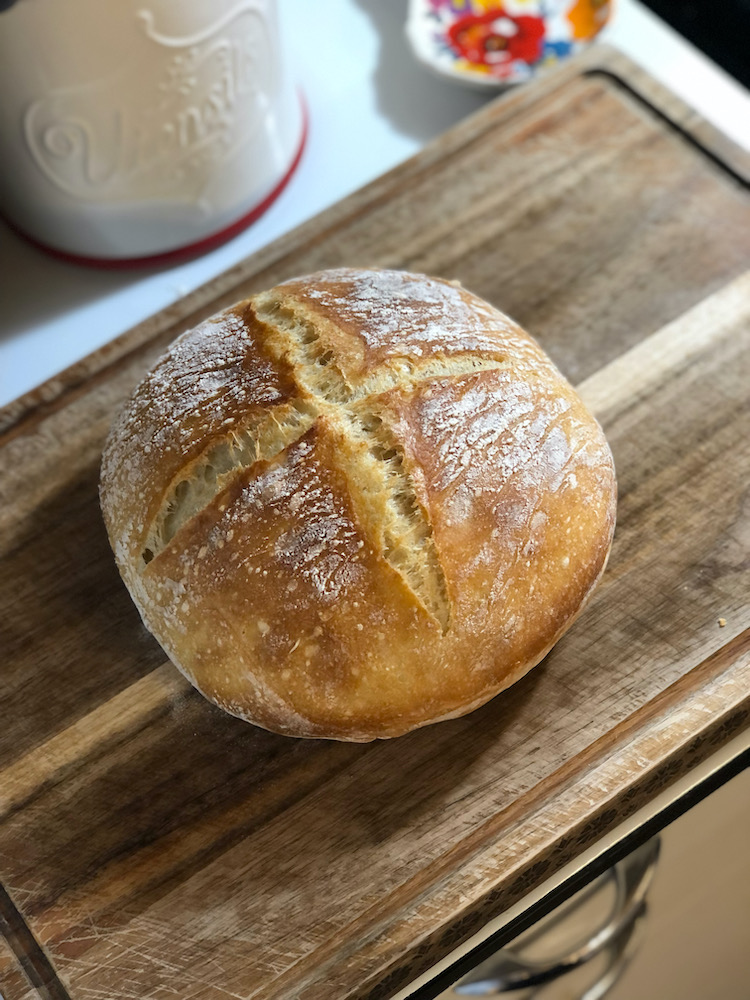
Once baking is complete, carefully take the loaf out of the Dutch oven and allow it to cool a bit on a wire rack. Then slice the bread and top with butter and enjoy!
Easy Dutch Oven Crusty Bread Recipe
Easy Dutch Oven Crusty Bread Recipe

Ingredients
- 3 C. Flour (I use All-Purpose)
- 1 Tsp. Salt
- 1/2 Tsp. Yeast
- 1.5 C. Warm Water
Instructions
1. Activate yeast in the warm water and set it aside.
2. Combine flour & salt in a separate bowl.
3. Mix the activated yeast & warm water into the flour mixture. Don't overmix.
4. Cover with plastic wrap or a kitchen towel. Let sit to rise for at least 6 hours to maximum overnight.
5. After rising, turn out into a ball on a floured cutting board and let the dough rest for 30 minutes prior to baking.
6. While letting the dough sit out, put the round Dutch oven into the oven. Then start to pre-heat oven & Dutch oven to 450 degrees.
7. Once the oven has pre-heated and 30 minutes have passed, take out the Dutch oven (be careful, it is extremely hot!). Put the dough into the pre-heated Dutch oven. Slash an "X" on the top of the dough.
8. Replace the Dutch oven cover and put it into the oven to bake. Bake for 30 minutes.
9. Take off the lid to the Dutch oven and let the bread bake for another 10 minutes.
10. Take out of the oven. Carefully take out the bread and allow it to cool on a wire rack.
Notes
Pre-heating the dutch oven is important to create a non-stick surface. Do not use oil, butter or cooking spray in dutch oven prior to baking.
Barbra-Sue
I ve never baked bread in a Dutch oven before. It looks beautiful
Mountain Mama
Thank you so much, Barbra-Sue! 🙂